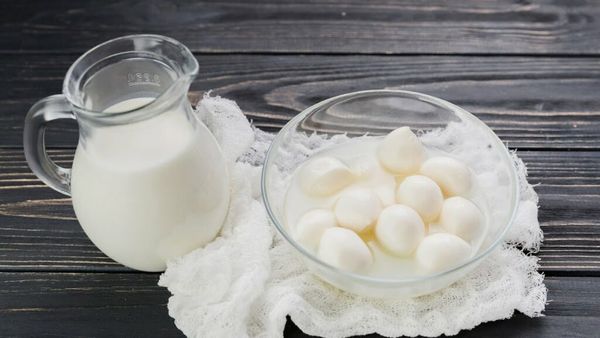
Imagine the joy of creating fresh mozzarella in your own kitchen using a recipe that has been passed down for centuries. With just two simple ingredients, you can embark on a journey to the origins of traditional cheese-making. Let’s explore how you can bring this timeless delicacy to your table and add a touch of ancient culinary tradition to your meals.
1. Gather the Ingredients
To get started with your mozzarella-making adventure, you’ll need the following ingredients:
- 1 gallon of whole milk (preferably fresh and not ultra-pasteurized)
- 1/4 cup of lemon juice or citric acid solution
These fundamental ingredients have remained unchanged through the ages and are all you need to begin your mozzarella-making journey.
2. Gently Heat the Milk
Begin by pouring the milk into a large pot. Slowly warm the milk to 90°F (32°C), stirring constantly to prevent scorching. This gentle heating process is crucial as it prepares the milk proteins to coagulate properly without becoming rubbery.
3. Add the Acid
Once the milk reaches the desired temperature, it’s time to add the lemon juice or citric acid solution. Stir it gently for about 30 seconds, then let it sit. You’ll notice the milk starting to curdle as the acid works its magic, separating the curds from the whey.
4. Check the Curd
After adding the acid, allow the milk to sit undisturbed for 5-10 minutes. The curd should become firm enough to slice with a knife and pull away from the sides of the pot. If it’s still too soft, give it a few more minutes.
5. Cut and Cook the Curd
Once the curd has set, cut it into cubes while still in the pot. Heat it again to approximately 105°F (40°C). This step helps further solidify the curds. Stir gently to prevent them from sticking together.
6. Drain and Stretch
Transfer the curds to a colander or cheesecloth to drain off the whey. Now, get ready for the exciting part: stretching! Heat the curds in hot water or briefly microwave them until they become elastic. Stretch and fold the curds repeatedly until the cheese turns smooth and shiny, shaping it into a ball along the way.
7. Cool and Store
Once you’ve shaped your mozzarella, submerge it in a bowl of ice water to set its shape and cool it down. After cooling, your homemade mozzarella is ready to be enjoyed. Store it in the refrigerator, submerged in a small amount of whey or brine to keep it moist.
Why Make Mozzarella at Home?
There are several compelling reasons to try making mozzarella at home:
Flavor and Freshness: Nothing compares to the taste of freshly made mozzarella. The burst of rich and creamy flavors will elevate your culinary creations.
A Touch of History: By making your own mozzarella, you have the opportunity to connect with an ancient culinary art that has delighted palates for centuries. It’s a chance to immerse yourself in the culinary traditions of the past.
Satisfaction of DIY: There’s an indescribable satisfaction in creating something delicious with your own hands. Making mozzarella at home allows you to take pride in your culinary skills and share your creations with loved ones.
With this ancient two-ingredient mozzarella recipe, you’re not just making cheese. You’re recreating a piece of culinary history in the comfort of your own kitchen. Indulge in the fruits of your labor by pairing your homemade mozzarella with vine-ripened tomatoes, fresh basil, and a drizzle of olive oil for a truly classic and delightful experience!